
It’s that time of the year when all you want to do is cosy up inside and close the curtains on the blustery, rainy grimness that is winter weather at the moment. A perfect time to look at those crafty projects you’ve had on your to-do list (or Pinterest board!) for ages. We follow a few wedding blogs and the trend over the past couple of years is definitely leaning towards a more DIY vibe, a by product of the recession I guess, but also people trying to break away from the usual old wedding look and go for something different and more personal. We are, obviously, loving this move towards DIY weddings (see pics of Sophie’s wedding crafts here) and have been compiling scrapboards of crafts that would be perfect for such an occasion – have a look at our Pinterest boards here, here and here!
Credit: http://www.elmorecourt.com/blog/wedding-trend-alert/
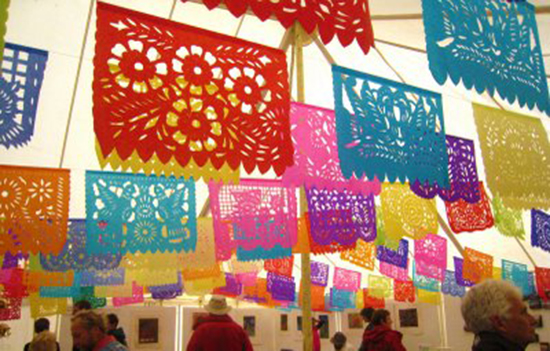
As Valentine’s Day is nearly upon us, I thought I would kill two crafty birds with one stone and make a few paper crafts that could work for both celebrations. First up is papel picado – sounds fancy, but luckily not too hard to put together yourself. It is basically Mexican bunting which is often multicoloured, very detailed and hung up at weddings, birthdays, fiestas… Papel picado is traditionally chiselled out of tissue paper, but I’ve found a simpler version which uses good old scissors. I came across this tutorial on the Style Me Pretty site which also has loads of great ideas for parties, recipes and more. They include a template which I followed but obviously you can create whatever pattern you like. You have to be a bit patient as the tiny bits are fiddly to cut out, but it looks really effective in the end.

The other craft we spotted is folded paper hearts on sticks which would look fantastic in a big bunch in a jam jar as a table centrepiece or just scattered around a wedding venue. They are super easy and cheap to put together – all you need is some paper, scissors, a lollipop stick or similar, and double sided sticky tape. Here’s a guide from A Kiss of Colour on how to put them together. They’ve put sweets in theirs which is a cute idea, but I just went for plain ones.
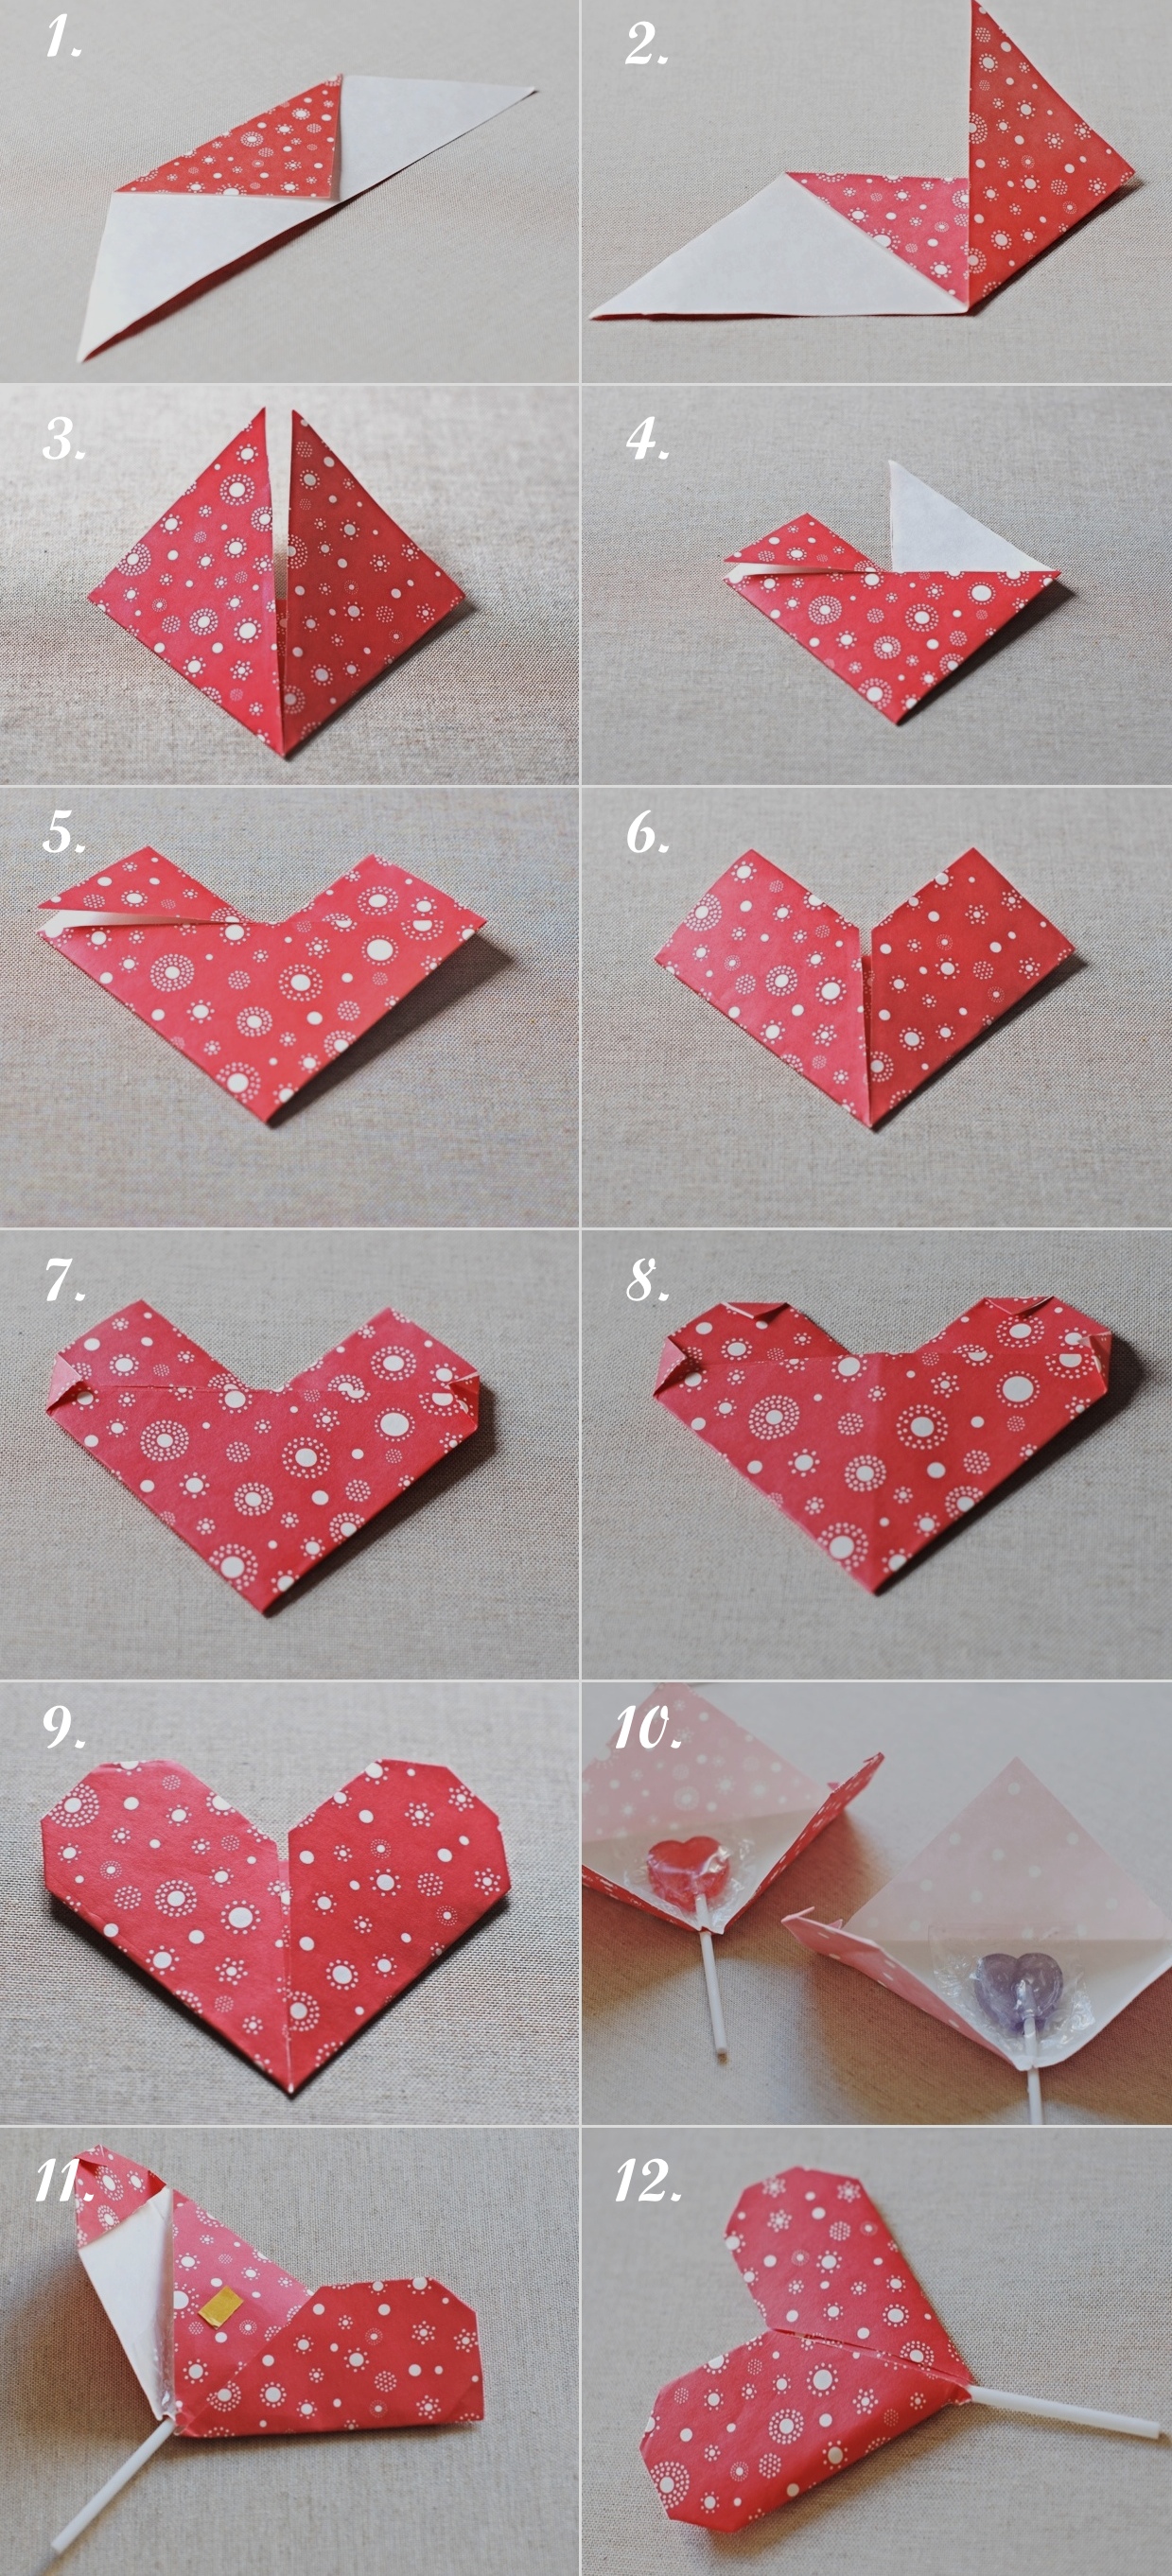
http://akissofcolour.com/2012/02/diy-14-corazones-para-san-valentin-valentines-hearts/
And here are our multicoloured beauties!
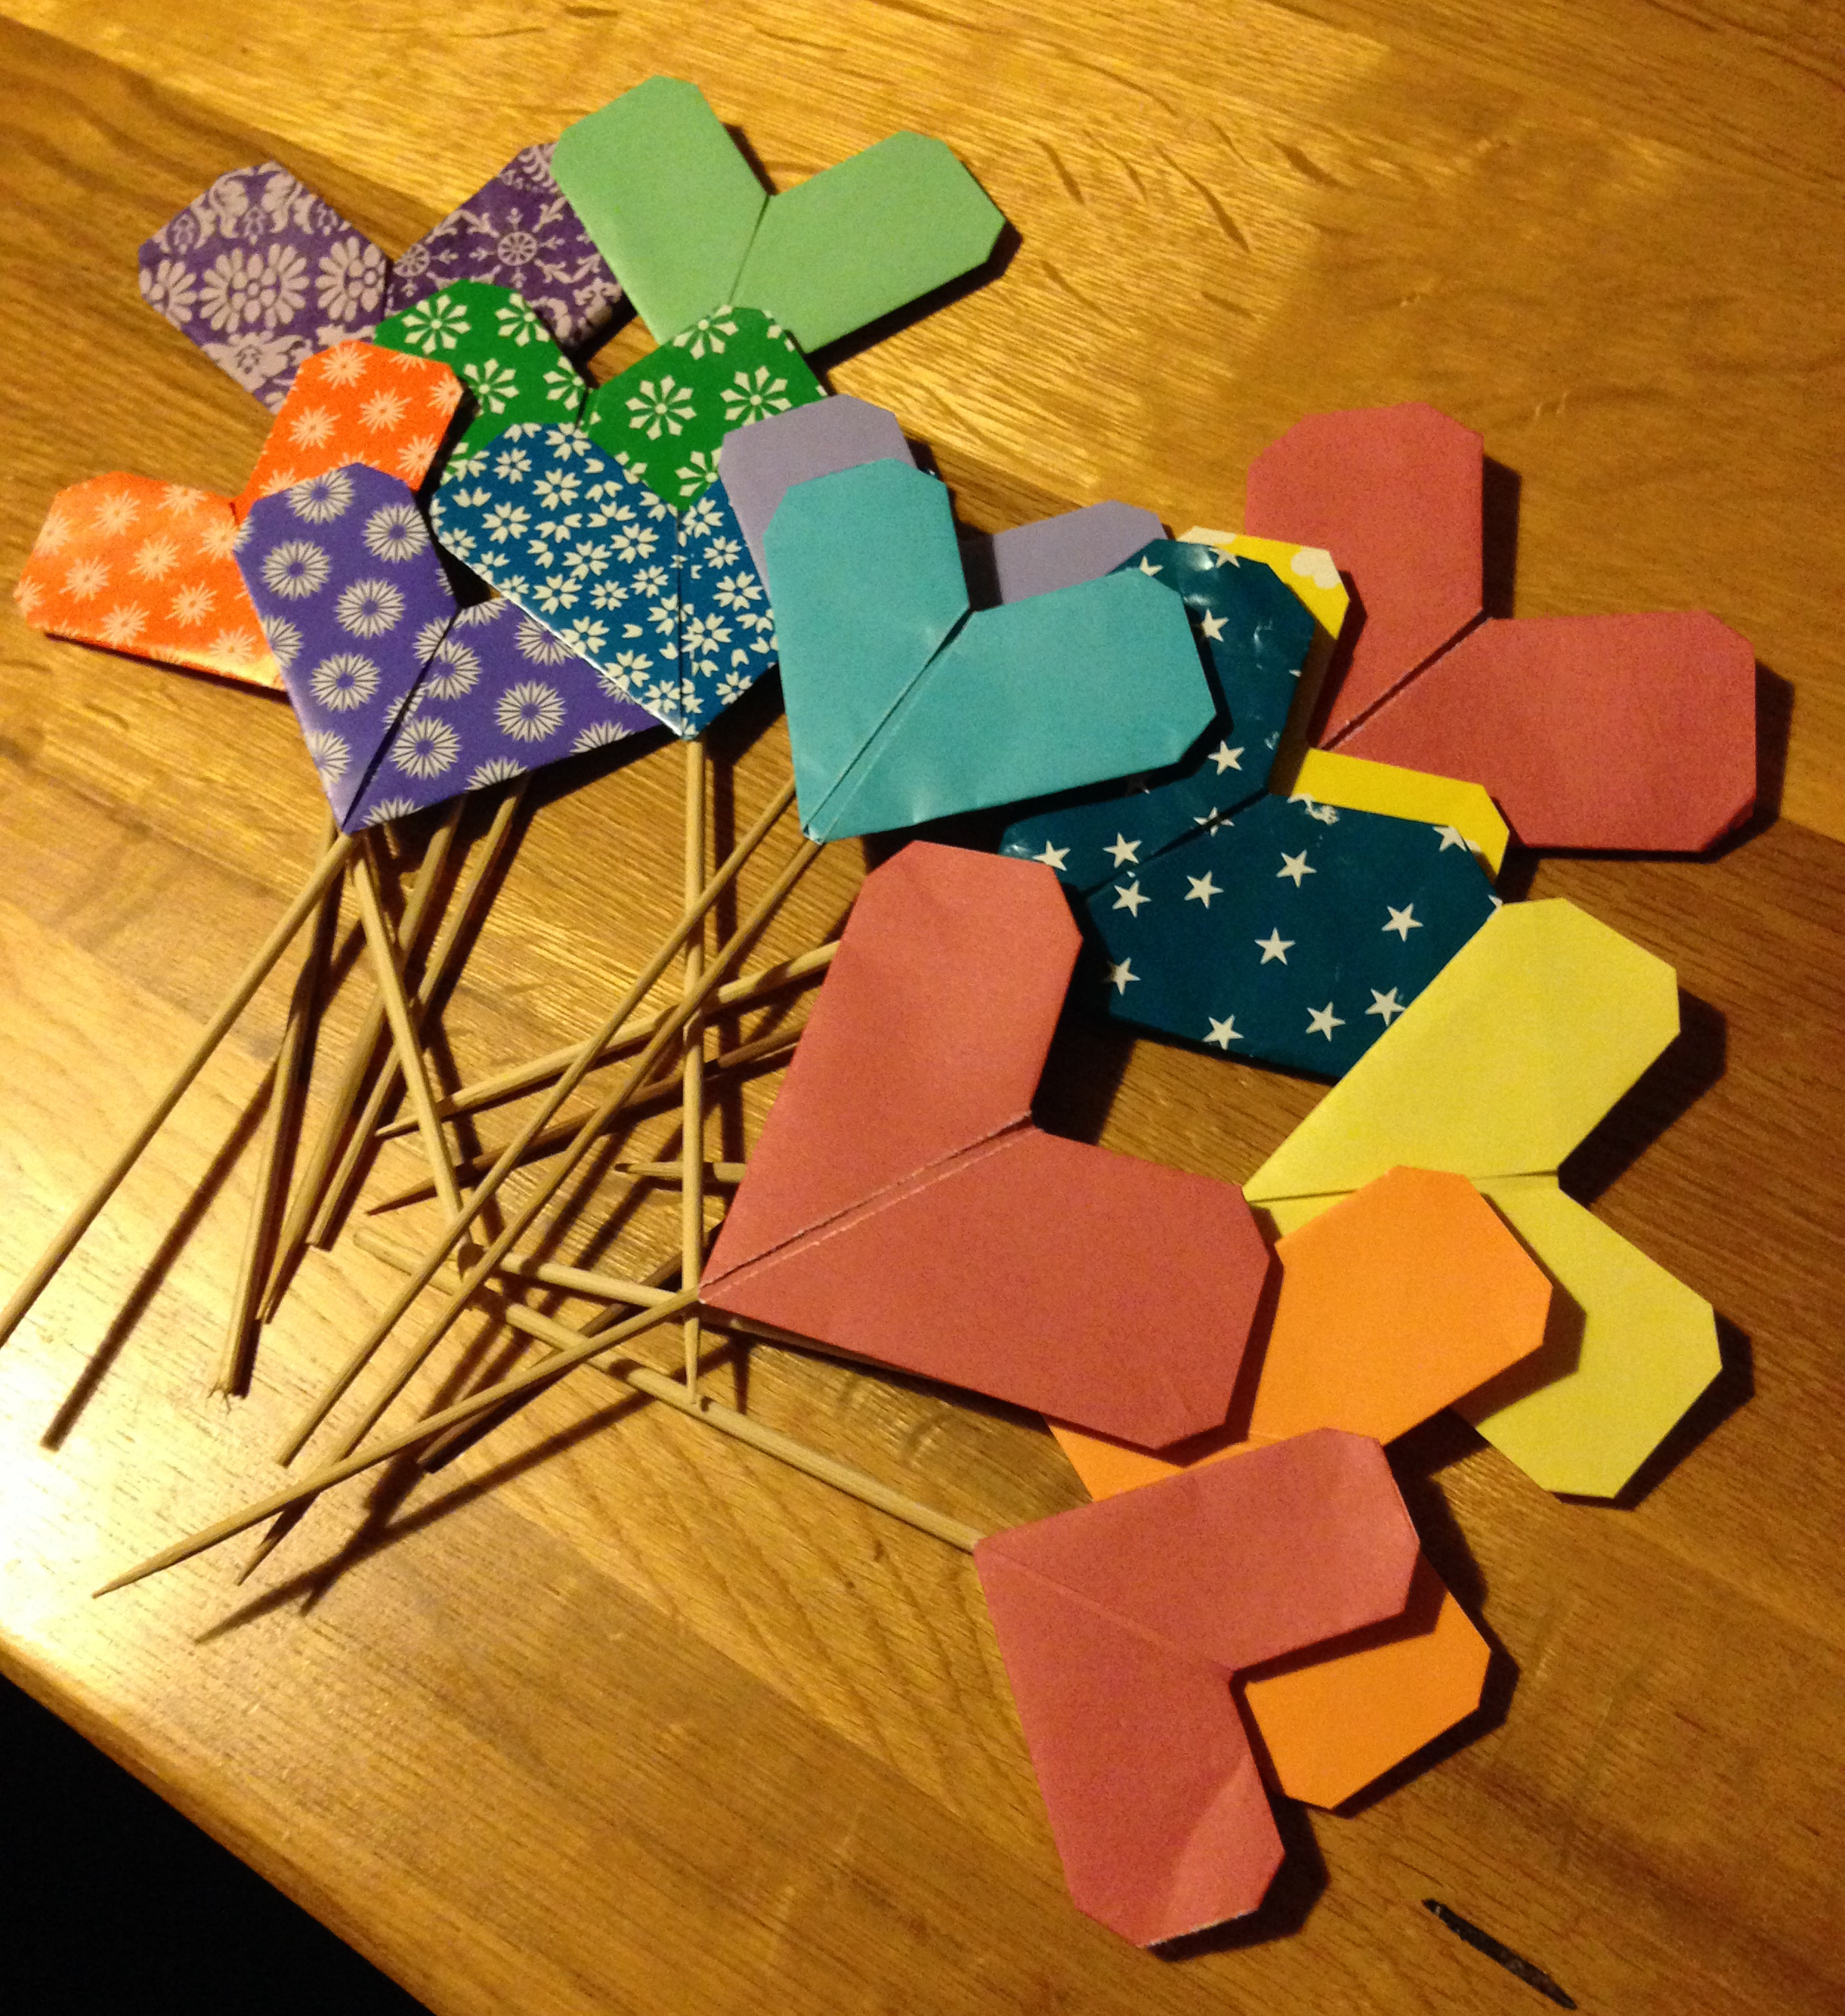
Our decorations will be displayed in local Leamington deli and sandwich shop – The Rustic Food Company – to help advertise their lovely Valentine’s treats.


 How to make: Lay out the bag, and with lots of studs to hand, play around with different designs. Make a note of your final design with a photograph, or by marking the material with chalk or a biro pen. Put the studs to one side, in the same layout if possible. One by one, attach the studs to the bag. Position the stud in place, then firmly push through the bag material. On the inside of the bag, push the material around the stud claws down, to fully expose the stud. Take care not to hurt yourself here. Carefully push the claws down into the centre, using the thimble, or the back face of some scissors. Repeat for all the studs, working in a methodical way to layout your pattern. Enjoy the compliments, smug in the knowledge that you are now the owner of a completely unique accessory!